How to Master 10 Essential Standing Yoga Poses

Mastering standing yoga poses can transform your practice, and using a standing yoga poses chart can help you visualize and learn these essential positions. These poses build strength, improve balance, and enhance flexibility. Proper technique not only maximizes these benefits but also helps you avoid injuries. You’ll find that incorporating these poses into your daily routine can lead to significant improvements in your overall well-being. So, why not take a moment to explore how these essential poses can elevate your yoga journey?
Key Takeaways
Incorporate standing yoga poses into your routine to build strength, improve balance, and enhance flexibility.
Use a standing yoga poses chart to visualize your alignment and technique, helping you master each pose effectively.
Listen to your body and modify poses as needed to avoid discomfort and prevent injuries.
Regular practice of standing poses can lead to significant improvements in your overall well-being and mental clarity.
Start with beginner-friendly poses like Mountain Pose and Triangle Pose to build a solid foundation.
Aim to practice standing yoga poses at least two to three times a week for optimal results.
Focus on mindfulness and deep breathing during your practice to reduce stress and promote relaxation.
Mountain Pose (Tadasana)
How to Perform Mountain Pose
To begin Mountain Pose, stand tall with your feet together. Ground your feet firmly into the floor. Engage your thighs and lift your kneecaps slightly. Lengthen your spine by reaching the crown of your head toward the ceiling. Relax your shoulders away from your ears. Allow your arms to rest alongside your body or raise them overhead, palms facing each other. Breathe deeply and hold this pose for several breaths, feeling the energy flow through your body.
Benefits of Mountain Pose
Mountain Pose offers numerous benefits. It strengthens your legs and core muscles, which helps improve your overall stability. This pose also targets your spine muscles, promoting better posture. You’ll find that practicing Mountain Pose restores balance by strengthening your joints.
Research shows that regular practice of Mountain Pose enhances your nervous and skeletal systems. It also boosts your digestive and respiratory functions. This pose encourages you to strive for active balance, helping you connect with a deeper part of yourself.
Precautions for Mountain Pose
While Mountain Pose is generally safe, you should take some precautions. If you have a history of ankle or knee injuries, consult a healthcare professional before practicing. Pay attention to your alignment. Keep your spine straight and avoid locking your knees. If you feel any discomfort, modify the pose or come out of it. Always listen to your body and practice mindfully.
Warrior I (Virabhadrasana I)
How to Perform Warrior I
To enter Warrior I, start in a standing position. Step your left foot back about three to four feet. Angle your left foot slightly outward. Bend your right knee, ensuring it stays directly over your right ankle. Keep your left leg straight and strong. Raise your arms overhead, palms facing each other. Open your chest and gaze forward. Hold this pose for several breaths, feeling the strength and stability it brings.
Benefits of Warrior I
Warrior I offers fantastic benefits for your body and mind. This pose strengthens your legs, core, and arms. You’ll notice improved flexibility in both your upper and lower body. It stretches various muscle groups, enhancing your overall physical well-being.
Research shows that regular practice of Warrior I can boost your strength and flexibility. It also improves your balance and stability. You’ll find that this pose helps you cultivate focus and determination, making it a powerful addition to your yoga routine.
Precautions for Warrior I
While Warrior I is beneficial, you should take some precautions. If you have knee or back issues, consult a healthcare professional before practicing. Pay attention to your alignment. Ensure your front knee does not extend past your ankle. Keep your hips squared toward the front. If you feel any discomfort, modify the pose or come out of it. Always listen to your body and practice mindfully.
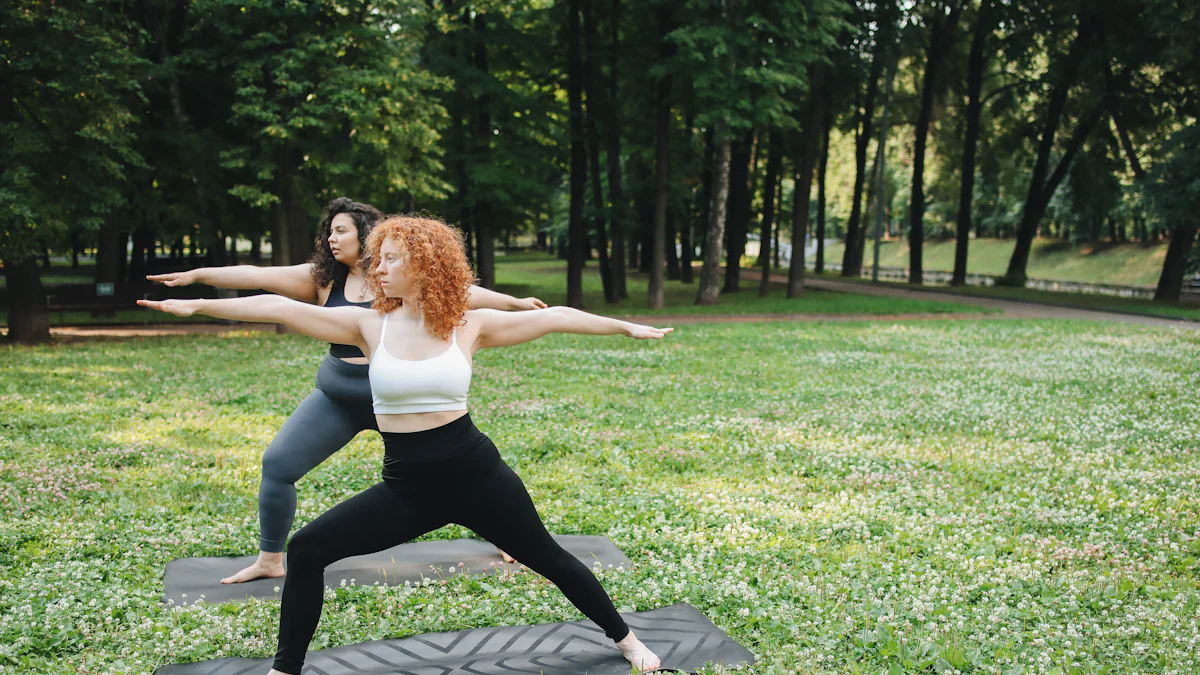
Warrior II (Virabhadrasana II)
How to Perform Warrior II
To enter Warrior II, start in a standing position. Step your left foot back about three to four feet. Turn your left foot slightly outward. Bend your right knee, keeping it directly over your right ankle. Extend your arms out to the sides, parallel to the floor, with your palms facing down. Gaze over your right fingertips. Hold this pose for several breaths, feeling the strength and stability it brings to your body.
Benefits of Warrior II
Warrior II offers fantastic benefits for both your body and mind. This pose strengthens your legs, particularly the quadriceps of your front leg. Research shows that Warrior II activates the quadriceps of the back leg as well, enhancing muscle engagement throughout your lower body.
Practicing Warrior II improves your balance and stability. You’ll notice increased flexibility in your hips and shoulders. This pose also encourages focus and determination, making it a powerful addition to your yoga routine.
Additionally, Warrior II promotes better posture and alignment. It opens your chest and lungs, allowing for deeper breathing. You may find that this pose helps you connect with your inner strength, boosting your confidence and mental clarity.
Precautions for Warrior II
While Warrior II is generally safe, you should take some precautions. If you have knee or hip issues, consult a healthcare professional before practicing. Pay attention to your alignment. Ensure your front knee does not extend past your ankle. Keep your hips squared toward the front. If you feel any discomfort, modify the pose or come out of it. Always listen to your body and practice mindfully.
Incorporating Warrior II into your routine can enhance your overall practice. Use a standing yoga poses chart to visualize your alignment and technique. This can help you master the pose and enjoy its many benefits.
Triangle Pose (Trikonasana)
How to Perform Triangle Pose
To enter Triangle Pose, start by standing tall with your feet hip-width apart. Step your left foot back about three to four feet. Turn your left foot slightly outward at a 45-degree angle. Bend your right knee, keeping it directly over your right ankle. Extend your arms out to the sides, parallel to the floor, with your palms facing down.
Now, reach your right hand forward, and tilt your torso to the right. Lower your right hand to your shin, ankle, or the floor, depending on your flexibility. Keep your left arm extended overhead, creating a straight line from your left fingertips to your left foot. Gaze up at your left hand. Hold this pose for several breaths, feeling the stretch and strength in your body.
Benefits of Triangle Pose
Triangle Pose offers a wealth of benefits for both your body and mind. This pose strengthens your legs, particularly your hamstrings and hips. It also opens your chest and shoulders, enhancing your breathing capacity.
Research shows that practicing Triangle Pose improves flexibility and balance. You’ll notice increased strength in your core and lower body. This pose serves as a great warm-up for more advanced yoga poses. It helps you develop strong and flexible hip bones, which are essential for various yoga practices.
Additionally, Triangle Pose promotes mental clarity and focus. You may find that it calms your mind and reduces stress. By incorporating this pose into your routine, you can enhance your overall well-being.
Precautions for Triangle Pose
While Triangle Pose is beginner-friendly, you should take some precautions. If you have any neck or back issues, consult a healthcare professional before practicing. Pay attention to your alignment. Ensure your front knee does not extend past your ankle. Keep your torso long and avoid collapsing into your lower back.
If you feel any discomfort, modify the pose or come out of it. Always listen to your body and practice mindfully. Using a standing yoga poses chart can help you visualize your alignment and technique, making it easier to master this pose.
Tree Pose (Vrksasana)
How to Perform Tree Pose
To enter Tree Pose, start by standing tall with your feet hip-width apart. Shift your weight onto your left foot. Bend your right knee and place the sole of your right foot against your inner left thigh or calf. Avoid placing it directly on your knee. Find a focal point in front of you to help maintain your balance.
Once you feel stable, bring your hands to your heart center in a prayer position. If you want to deepen the pose, raise your arms overhead, keeping them parallel or bringing your palms together. Hold this pose for several breaths, feeling the strength and stability grow within you.
Benefits of Tree Pose
Tree Pose offers fantastic benefits for your body and mind. This pose improves your balance and strengthens your core, glutes, legs, and back muscles. You’ll notice how it replicates the graceful, steady stance of a tree, enhancing your overall stability.
Research shows that practicing Tree Pose can significantly boost your body awareness. You’ll engage your muscles and improve your focus. This pose also encourages mindfulness, helping you connect with your breath and the present moment.
Incorporating Tree Pose into your routine can enhance your overall yoga practice. It serves as a great way to build strength and flexibility while promoting mental clarity.
Precautions for Tree Pose
While Tree Pose is generally safe, you should take some precautions. If you have any knee or ankle injuries, consult a healthcare professional before practicing. Pay attention to your alignment. Keep your standing leg straight and avoid locking your knee.
If you feel any discomfort, modify the pose or come out of it. Always listen to your body and practice mindfully. Using a standing yoga poses chart can help you visualize your alignment and technique, making it easier to master this pose.
Chair Pose (Utkatasana)
How to Perform Chair Pose
To enter Chair Pose, start by standing tall with your feet hip-width apart. Inhale deeply and bend your knees, lowering your hips as if you’re about to sit in an imaginary chair. Keep your weight in your heels. Your thighs should be parallel to the floor. Raise your arms overhead, keeping them shoulder-width apart. Gaze forward, maintaining a straight spine. Hold this pose for several breaths, feeling the strength build in your legs and core.
Benefits of Chair Pose
Chair Pose offers a wealth of benefits for your body. This pose strengthens your legs, particularly your quadriceps and glutes. You’ll also engage your core muscles, which helps improve your overall stability.
Research highlights that Chair Pose activates the rectus femoris muscle more than many other standing yoga poses. This activation enhances your leg strength and endurance. You may notice improved balance and posture as you practice this pose regularly.
Additionally, Chair Pose can boost your mental focus. It challenges your concentration and determination, making it a great way to cultivate mindfulness during your practice.
Precautions for Chair Pose
While Chair Pose is beneficial, you should take some precautions. If you have knee or back issues, consult a healthcare professional before practicing. Pay attention to your alignment. Keep your knees behind your toes to avoid strain. If you feel any discomfort, modify the pose or come out of it. Always listen to your body and practice mindfully.
Using a standing yoga poses chart can help you visualize your alignment and technique, making it easier to master Chair Pose.
Extended Side Angle Pose (Utthita Parsvakonasana)
How to Perform Extended Side Angle Pose
To enter Extended Side Angle Pose, start in a standing position. Step your left foot back about three to four feet. Turn your left foot slightly outward. Bend your right knee, ensuring it stays directly over your right ankle. Extend your arms out to the sides, parallel to the floor, with your palms facing down.
Now, reach your right hand forward and lower it to your right ankle, shin, or the floor, depending on your flexibility. Keep your left arm extended overhead, creating a straight line from your left fingertips to your left foot. Gaze up at your left hand. Hold this pose for several breaths, feeling the stretch and strength throughout your body.
Benefits of Extended Side Angle Pose
Extended Side Angle Pose offers a variety of benefits for your body and mind. This pose strengthens and stretches your legs, hips, and spine. You’ll notice improved flexibility in these areas, which can enhance your overall mobility.
Research shows that practicing Utthita Parsvakonasana energizes your body. It activates your core muscles, helping you build strength and stability. You may also find that this pose improves your balance, making it easier to transition into other standing yoga poses.
Additionally, this pose promotes mental clarity. As you focus on your breath and alignment, you cultivate mindfulness. This connection between body and mind can reduce stress and enhance your overall well-being.
Precautions for Extended Side Angle Pose
While Extended Side Angle Pose is generally safe, you should take some precautions. If you have any neck, back, or knee issues, consult a healthcare professional before practicing. Pay attention to your alignment. Ensure your front knee does not extend past your ankle. Keep your torso long and avoid collapsing into your lower back.
If you feel any discomfort, modify the pose or come out of it. Always listen to your body and practice mindfully. Using a standing yoga poses chart can help you visualize your alignment and technique, making it easier to master this pose.
Half Moon Pose (Ardha Chandrasana)
How to Perform Half Moon Pose
To enter Half Moon Pose, start in a standing position. Begin with your feet hip-width apart. Shift your weight onto your left foot. Bend your right knee and extend your right leg behind you. As you do this, reach your right arm forward and lower your right hand to the floor or a block. Your left arm should extend straight up toward the ceiling. Keep your body aligned and your gaze focused on your left hand. Hold this pose for several breaths, feeling the strength and balance it brings.
Benefits of Half Moon Pose
Half Moon Pose offers a variety of benefits for your body and mind. This pose strengthens your ankles, knees, legs, core, spine, chest, and shoulders. You’ll notice improved balance and stability as you practice. Research shows that standing yoga poses challenge proprioception and coordination, which enhances your overall body awareness.
Practicing Half Moon Pose can also boost your flexibility. It stretches your hamstrings and opens your hips. You may find that this pose helps you develop a deeper connection between your body and mind. As you focus on your breath and alignment, you cultivate mindfulness, reducing stress and promoting relaxation.
Precautions for Half Moon Pose
While Half Moon Pose is beneficial, you should take some precautions. If you have any neck, back, or knee issues, consult a healthcare professional before practicing. Pay attention to your alignment. Ensure your standing leg remains straight and avoid locking your knee. If you feel any discomfort, modify the pose or come out of it. Always listen to your body and practice mindfully. Using a standing yoga poses chart can help you visualize your alignment and technique, making it easier to master this pose.
Forward Fold (Uttanasana)
How to Perform Forward Fold
To enter Forward Fold, start by standing tall with your feet hip-width apart. Inhale deeply and as you exhale, hinge at your hips. Allow your upper body to fold forward while keeping your spine long. Let your hands reach toward the floor, your shins, or your ankles. If you can, grab your elbows and let your head hang heavy. Keep a slight bend in your knees if needed to avoid straining your lower back. Hold this pose for several breaths, feeling the stretch in your hamstrings and lower back.
Benefits of Forward Fold
Forward Fold offers a multitude of benefits for your body and mind. This pose stretches your hamstrings, calves, and spine, enhancing your overall flexibility. Research shows that it reduces stiffness and promotes spinal flexibility. You’ll notice how it strengthens your supporting muscles, which helps improve your posture.
Additionally, Forward Fold relieves tension in your neck, shoulders, and upper back. As you fold forward, you create space in your spine, allowing for deeper breathing. This pose also encourages relaxation and mindfulness, making it a great way to unwind after a long day.
Incorporating Forward Fold into your routine can significantly enhance your yoga practice. It serves as a gentle way to connect with your breath and body, promoting a sense of calm and balance.
Precautions for Forward Fold
While Forward Fold is generally safe, you should take some precautions. If you have any back or knee issues, consult a healthcare professional before practicing. Pay attention to your alignment. Keep your spine straight and avoid rounding your back. If you feel any discomfort, modify the pose or come out of it. Always listen to your body and practice mindfully. Using a standing yoga poses chart can help you visualize your alignment and technique, making it easier to master this pose.
Revolved Side Angle Pose (Parivrtta Parsvakonasana)
How to Perform Revolved Side Angle Pose
To enter Revolved Side Angle Pose, start in a standing position. Step your left foot back about three to four feet. Angle your left foot slightly outward. Bend your right knee, keeping it directly over your right ankle. Extend your arms out to the sides, parallel to the floor, with your palms facing down.
Now, twist your torso to the right. Bring your left elbow to rest on your right knee. If you can, reach your right arm overhead, creating a straight line from your fingertips to your left foot. Keep your gaze focused on your right hand. Hold this pose for several breaths, feeling the stretch and strength throughout your body.
Benefits of Revolved Side Angle Pose
Revolved Side Angle Pose offers a variety of benefits for your body and mind. This pose strengthens your legs, hips, and core. You’ll notice improved flexibility in your spine and shoulders.
Research shows that practicing this pose enhances spinal mobility. It also stimulates digestion, making it a great addition to your routine. While some studies suggest that twisted yoga poses may not significantly improve digestion, they do promote spinal health and mobility.
Additionally, this pose encourages mindfulness. As you focus on your breath and alignment, you cultivate a deeper connection between your body and mind. This connection can help reduce stress and enhance your overall well-being.
Precautions for Revolved Side Angle Pose
While Revolved Side Angle Pose is beneficial, you should take some precautions. If you have any neck, back, or knee issues, consult a healthcare professional before practicing. Pay attention to your alignment. Ensure your front knee does not extend past your ankle. Keep your torso long and avoid collapsing into your lower back.
If you feel any discomfort, modify the pose or come out of it. Always listen to your body and practice mindfully. Using a standing yoga poses chart can help you visualize your alignment and technique, making it easier to master this pose.
Mastering standing yoga poses can significantly enhance your practice. These poses build strength, improve balance, and promote flexibility. Regular practice leads to noticeable improvements in your overall well-being. Remember to listen to your body. Modify poses as needed to suit your comfort level. Incorporate a standing yoga poses chart into your routine for better alignment and technique. With dedication, you’ll find joy and growth in your yoga journey.
FAQ
Are standing yoga poses good for beginners to try?
Absolutely! Certain standing poses work well for beginners. They offer stability and help you build strength as you progress toward more advanced poses. You might want to start with Mountain Pose, Standing Forward Bend, and Triangle Pose. Warrior I and Chair Pose also make great options for beginners.
What are the benefits of standing yoga poses?
Standing yoga poses provide numerous benefits. They enhance flexibility, balance, and posture. You’ll notice improvements in your concentration as well. These poses strengthen your legs, core, and back muscles. However, if you have health conditions like high blood pressure, vertigo, or recent injuries to your legs, hips, or spine, proceed with caution.
How often should I practice standing yoga poses?
Aim to practice standing yoga poses at least two to three times a week. Consistency helps you build strength and improve your balance over time. You can incorporate them into your regular yoga routine or use them as a warm-up before other exercises.
Can standing yoga poses help with stress relief?
Yes, they can! Standing yoga poses encourage mindfulness and deep breathing. As you focus on your alignment and breath, you create a calming effect on your mind. This practice can help reduce stress and promote relaxation.
What should I wear when practicing standing yoga poses?
Wear comfortable, breathable clothing that allows for easy movement. Opt for yoga pants or leggings and a fitted top. Make sure your clothing doesn’t restrict your movements. Good grip socks or bare feet work best for stability.
Do I need any equipment for standing yoga poses?
You don’t need much equipment to practice standing yoga poses. A yoga mat provides a non-slip surface. If you’re new to yoga, consider using blocks for support in certain poses. They can help you maintain proper alignment and balance.
How can I improve my balance in standing yoga poses?
Improving balance takes practice. Focus on engaging your core muscles and grounding through your feet. Use a wall or chair for support when needed. Gradually challenge yourself by trying poses without support as you gain confidence.
What if I feel pain while practicing standing yoga poses?
If you experience pain, stop immediately. Pain signals that something isn’t right. Modify the pose or come out of it entirely. Always listen to your body and consult a healthcare professional if the pain persists.
Can I practice standing yoga poses during pregnancy?
Yes, many standing yoga poses are safe during pregnancy, but always consult your healthcare provider first. Focus on poses that promote stability and avoid those that require deep twists or balance. Listen to your body and modify as needed.
How can I track my progress in mastering standing yoga poses?
Keep a journal to track your practice. Note the poses you work on, how you feel, and any improvements you notice. You can also take photos to visually document your progress. Celebrate your achievements, no matter how small!
See Also
A Comprehensive Guide to Perfecting the Plank Pose
Your Ultimate Guide to Conquering Yoga Asanas
Perfecting the Downward Dog Pose in Yoga Practice

Hi my name is Lia and i am your host in this yoga journey in Portugal, Subscribe to our newsletter to receive every week the best of Yoga in Portugal.

We bring back the importance of initiation into womanhood by Roos-Veerle Krijnen & Ella-June Henrard
Welcome to the Women’s Initiation Retreat by Naked Truth Retreats, a transformative journey into the depths of your True Feminine Nature. This retreat invites you to remember the sacredness and wholeness of your being.
Roos-Veerle Krijnen & Ella-June Henrard