How to Draw Yoga Asanas with Names Step by Step

Yoga has become a beloved practice for millions worldwide, with over 300 million practitioners globally. In the U.S., about 1 in 6 adults embrace yoga, highlighting its widespread appeal. Drawing yoga poses, or asanas, can deepen your understanding and appreciation of this ancient practice. Imagine capturing the essence of each pose on paper, creating your own yoga asanas chart. This guide will help you draw these poses accurately and label them confidently. Whether you're a seasoned yogi or a curious beginner, you'll find joy in illustrating the graceful forms of yoga.
Materials Needed for Drawing Yoga Asanas
To start your journey of drawing yoga asanas, you'll need some essential tools. These materials will help you capture the beauty and precision of each pose.
Basic Drawing Tools
Pencils and Erasers
A good pencil is your best friend when sketching yoga poses. Choose a set of pencils with varying hardness, like HB, 2B, and 4B. These will give you the flexibility to create light outlines and darker, more defined lines. Don't forget a reliable eraser. Mistakes happen, and an eraser lets you refine your drawings without stress.
Sketchbook or Drawing Paper
A quality sketchbook or drawing paper provides a solid foundation for your art. Look for paper that can handle erasing and shading without tearing. A sketchbook keeps your work organized and lets you track your progress over time. Plus, it's portable, so you can draw whenever inspiration strikes.
Optional Tools for Enhancement
Colored Pencils or Markers
Adding color to your yoga drawings can bring them to life. Colored pencils offer subtle shading and blending, while markers provide bold, vibrant hues. Experiment with both to see which suits your style. Color can highlight different parts of the pose, making it easier to understand and remember.
Ruler and Compass
For those who love precision, a ruler and compass are great additions. A ruler helps you maintain straight lines and proportions, especially in poses with strong geometric elements. A compass can assist in drawing perfect circles or curves, adding a professional touch to your sketches.
With these tools in hand, you're ready to dive into the world of yoga asana drawing. Each tool plays a role in helping you express the elegance and strength of yoga through art.
Step-by-Step Guide to Drawing Basic Yoga Poses
Mountain Pose (Tadasana)
Description of the Pose
Mountain Pose, or Tadasana, serves as the foundation for many standing yoga poses. You stand tall with feet together, arms at your sides, and weight evenly distributed. This pose embodies stability and strength, much like a mountain.
Step-by-Step Drawing Instructions
Start with the Head: Draw a small oval for the head at the top of your paper.
Outline the Torso: Sketch a vertical rectangle beneath the head for the torso.
Add the Legs: Extend two straight lines downward from the bottom of the torso, slightly apart, to represent the legs.
Draw the Arms: Position the arms alongside the torso using straight lines.
Refine the Details: Add curves to define the shoulders, waist, and hips. Ensure the feet are flat on the ground.
Tips for Labeling the Pose
Write "Mountain Pose" above your drawing.
Include the Sanskrit name, "Tadasana," below it.
Highlight key features like "straight spine" and "grounded feet."
Downward-Facing Dog (Adho Mukha Svanasana)
Description of the Pose
Downward-Facing Dog, or Adho Mukha Svanasana, resembles an inverted V shape. You form this pose by placing hands and feet on the ground, hips lifted high. It stretches the entire body and calms the mind.
Step-by-Step Drawing Instructions
Begin with the Hands: Draw two small circles for the hands at the bottom of your paper.
Sketch the Arms: Extend lines upward from the hands to form the arms.
Create the Hips: Draw a triangle at the top of the arms to represent the hips.
Add the Legs: Extend lines downward from the hips to form the legs, ending with small circles for the feet.
Detail the Body: Connect the arms and legs with a curved line for the back.
Tips for Labeling the Pose
Label the drawing with "Downward-Facing Dog."
Add "Adho Mukha Svanasana" beneath it.
Note features like "elongated spine" and "heels pressing down."
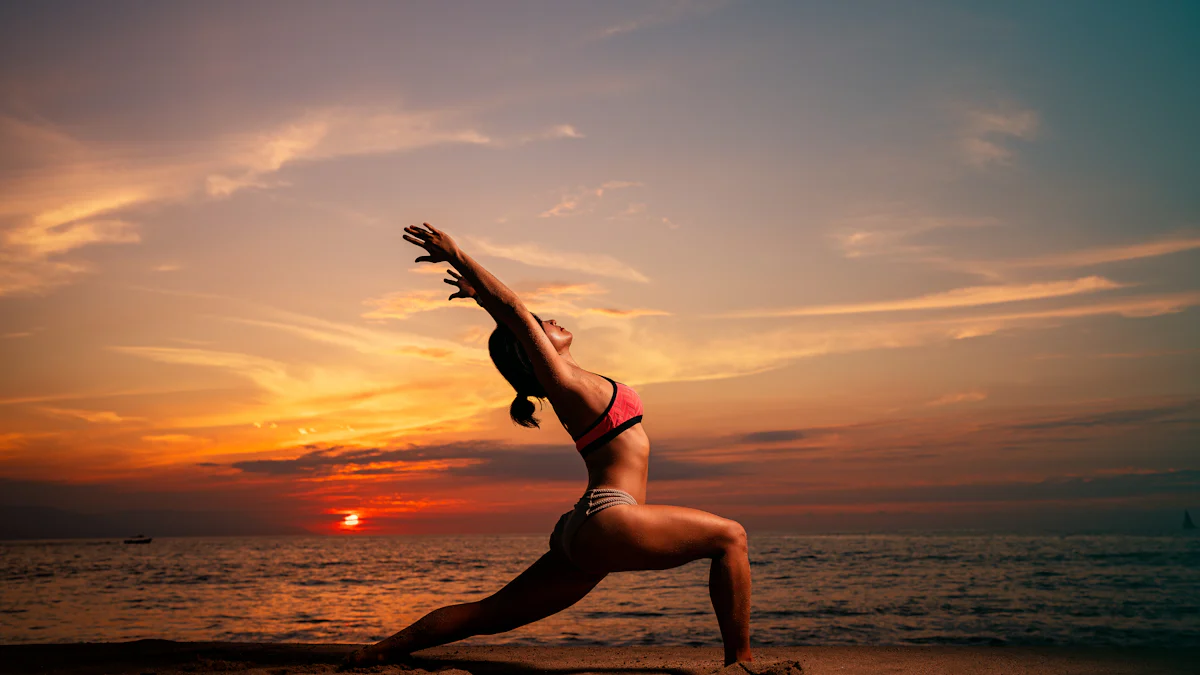
Warrior II (Virabhadrasana II)
Description of the Pose
Warrior II, or Virabhadrasana II, symbolizes strength and focus. In this pose, you stand with one leg forward, the other extended back, and arms stretched out parallel to the ground.
Step-by-Step Drawing Instructions
Draw the Head: Start with a small circle for the head.
Outline the Torso: Sketch a horizontal rectangle beneath the head for the torso.
Position the Arms: Extend straight lines from each side of the torso for the arms.
Add the Legs: Draw one leg bent forward and the other extended back, using straight lines.
Refine the Details: Add curves to define the shoulders, waist, and hips. Ensure the front knee aligns with the ankle.
Tips for Labeling the Pose
Write "Warrior II" above your drawing.
Include "Virabhadrasana II" below it.
Highlight features like "strong arms" and "focused gaze."
Drawing these poses not only enhances your artistic skills but also deepens your understanding of yoga. As research suggests, yoga improves visual-motor coordination and cognitive performance, making it a valuable practice for both mind and body.
Tips for Improving Drawing Skills and Accuracy
Enhancing your drawing skills takes time and dedication. Here are some tips to help you improve your accuracy and confidence in illustrating yoga asanas.
Practice Regularly
Regular practice is key to mastering any skill, and drawing is no exception. By setting aside dedicated time for drawing, you can steadily improve your abilities.
Set Aside Time for Drawing
Make drawing a part of your routine. Whether it's 15 minutes a day or an hour a week, consistency is crucial. This regular practice helps you build muscle memory and refine your technique. Think of it as a form of "brain yoga," similar to how Manjiri Vivek Sabnis describes Zentangling. It’s a serene way to develop mindfulness and spiritualism through art.
Experiment with Different Styles
Don't be afraid to try new styles. Experimenting with different techniques can open up new perspectives and enhance your creativity. You might find inspiration in books like *An Illustrated Guide to Asanas and Pranayama* by MJN Smith, which offers a wealth of examples on drawing stick figures. Exploring various styles can help you find what resonates with you and improve your overall drawing skills.
Study Real-Life References
Observing real-life references can significantly enhance your understanding of yoga poses. This practice allows you to capture the essence of each asana more accurately.
Observe Yoga Classes or Videos
Watching yoga classes or videos provides a dynamic view of how poses are performed. Pay attention to the alignment and flow of movements. This observation helps you understand the structure and balance of each pose, which you can then translate into your drawings.
Use Photos for Reference
Photos serve as excellent static references. They allow you to study the details of each pose at your own pace. Use them to examine the angles, proportions, and key features of the asanas. Combining these observations with your practice will lead to more accurate and lifelike drawings.
By incorporating these tips into your routine, you'll not only improve your drawing skills but also deepen your appreciation for the art of yoga. Remember, every sketch brings you one step closer to mastering the graceful forms of yoga asanas.
Common Mistakes to Avoid
When drawing yoga asanas, you might encounter some common pitfalls. Recognizing these mistakes can help you improve your skills and create more accurate representations.
Overcomplicating the Pose
Focus on Simplicity
Many beginners tend to overcomplicate their drawings by diving into intricate details too soon. This approach often leads to frustration and wasted time. Instead, focus on simplicity. Start by blocking out larger, simpler shapes. This method helps you establish the overall structure before adding finer details. Think of it as building a house; you need a solid foundation before decorating the rooms.
"A good rule of thumb is to start drawings by blocking out larger, simpler shapes before focusing on smaller details."
By keeping your initial sketches simple, you can ensure that your drawings maintain balance and proportion. This technique not only saves time but also enhances the quality of your artwork.
Incorrect Proportions
Use Guidelines for Accuracy
Proportion mistakes are common in figure drawing, and yoga asanas are no exception. You might find yourself drawing an enlarged head or small pelvis, which can throw off the entire pose. To avoid this, use guidelines to maintain accuracy. These lines act as a roadmap, helping you keep everything in proportion.
"An enlarged head, small pelvis, and even smaller legs are common proportion mistakes in figure drawing."
Pay special attention to the size of hands and feet. Many students draw them too small, affecting the overall balance of the figure. By using guidelines, you can ensure that each part of the body is correctly sized and positioned.
"75% of drawings from students have hands and feet too small, affecting overall proportions."
Remember, practice makes perfect. As you continue to draw, you'll develop a better eye for proportions and learn to avoid these common mistakes. Keep your approach simple and use guidelines to guide your way. With time and patience, your drawings will become more accurate and lifelike.
Creating a Yoga Asanas Chart
Creating a yoga asanas chart can be a rewarding project. It serves as both a visual reference and an educational tool. Let's explore how you can make your own chart and the benefits it offers.
Benefits of a Yoga Asanas Chart
Visual Reference for Drawing
A yoga asanas chart provides a handy visual reference. You can quickly glance at it to see the structure and alignment of each pose. This helps you draw more accurately and efficiently. Having a chart nearby means you don't have to rely solely on memory, which can sometimes lead to mistakes.
Educational Tool for Learning Names
Your chart isn't just for drawing. It's also a fantastic educational tool. By including both the English and Sanskrit names of the poses, you enhance your understanding of yoga. This dual labeling helps you remember the names more easily. Plus, it adds a touch of authenticity to your drawings.
Steps to Create Your Own Chart
Selecting Poses
Start by choosing the poses you want to include. Consider classic yoga asanas like Mountain Pose, Downward-Facing Dog, and Warrior II. These are foundational poses that many people recognize. You might also include other basic poses that you enjoy or find challenging. Aim for a mix that showcases different aspects of yoga.
Arranging and Labeling
Once you've selected your poses, think about how to arrange them on your chart. You could organize them by difficulty, type, or even alphabetically. Use clear labels for each pose. Write the English name above and the Sanskrit name below. This arrangement makes it easy to identify each pose at a glance.
Creating a yoga asanas chart is a creative and educational endeavor. It helps you improve your drawing skills while deepening your knowledge of yoga. Plus, it's a beautiful way to display your love for this ancient practice. So grab your materials and start crafting your chart today!
Encouragement and Motivation
Drawing yoga asanas can be a rewarding journey, but like any skill, it requires patience and persistence. Here’s how you can stay motivated and celebrate your progress along the way.
Celebrate Small Wins
Acknowledge Progress
Every sketch you complete is a step forward. Recognize these small victories. Did you capture the essence of a pose better than before? That's progress! Keep a journal or a sketchbook to track your improvements. This visual record will remind you of how far you've come. Reflecting on your journey can boost your confidence and inspire you to keep going.
"Yoga is not about touching your toes, it's about what you learn on the way down." – Jigar Gor
This quote applies to drawing as well. It's not just about the final image but what you learn through each stroke and line.
Stay Patient and Persistent
Embrace the Learning Process
Patience is key when learning to draw yoga asanas. You won't master it overnight, and that's okay. Embrace the process. Each attempt teaches you something new. Maybe you tried various yoga classes, styles, and teachers, just like someone who started practicing yoga five years ago. This exploration enriches your understanding and adds depth to your drawings.
Set realistic goals for yourself. Perhaps aim to draw one new pose each week. This steady pace prevents burnout and keeps the practice enjoyable. Remember, every artist was once a beginner. With time and dedication, your skills will grow.
"The expert in anything was once a beginner." – Helen Hayes
Keep this in mind as you continue your artistic journey. Celebrate your progress, stay patient, and enjoy the learning process. Your dedication will pay off, and you'll find joy in each drawing you create.
You've now explored the steps to draw and label yoga asanas with confidence. Remember, regular practice is your best friend in this journey. Enjoy the process of sketching and visual note-taking, as it helps you make sense of and remember new information. Drawing yoga stick figures can be a fantastic tool for both teachers and students. Improvement comes with time and dedication, so stay patient and persistent. Celebrate each small win along the way, and soon you'll see how far you've come in mastering the art of yoga illustration.
See Also
In-Depth Overview of Yoga Poses with Visuals
Simple Yoga Pose Illustrations for New Practitioners
Yoga Schedule: Simple Sketching Techniques

Hi my name is Lia and i am your host in this yoga journey in Portugal, Subscribe to our newsletter to receive every week the best of Yoga in Portugal.

We bring back the importance of initiation into womanhood by Roos-Veerle Krijnen & Ella-June Henrard
Welcome to the Women’s Initiation Retreat by Naked Truth Retreats, a transformative journey into the depths of your True Feminine Nature. This retreat invites you to remember the sacredness and wholeness of your being.
Roos-Veerle Krijnen & Ella-June Henrard