10 Essential Tips for Capturing Artistic Yoga Pictures
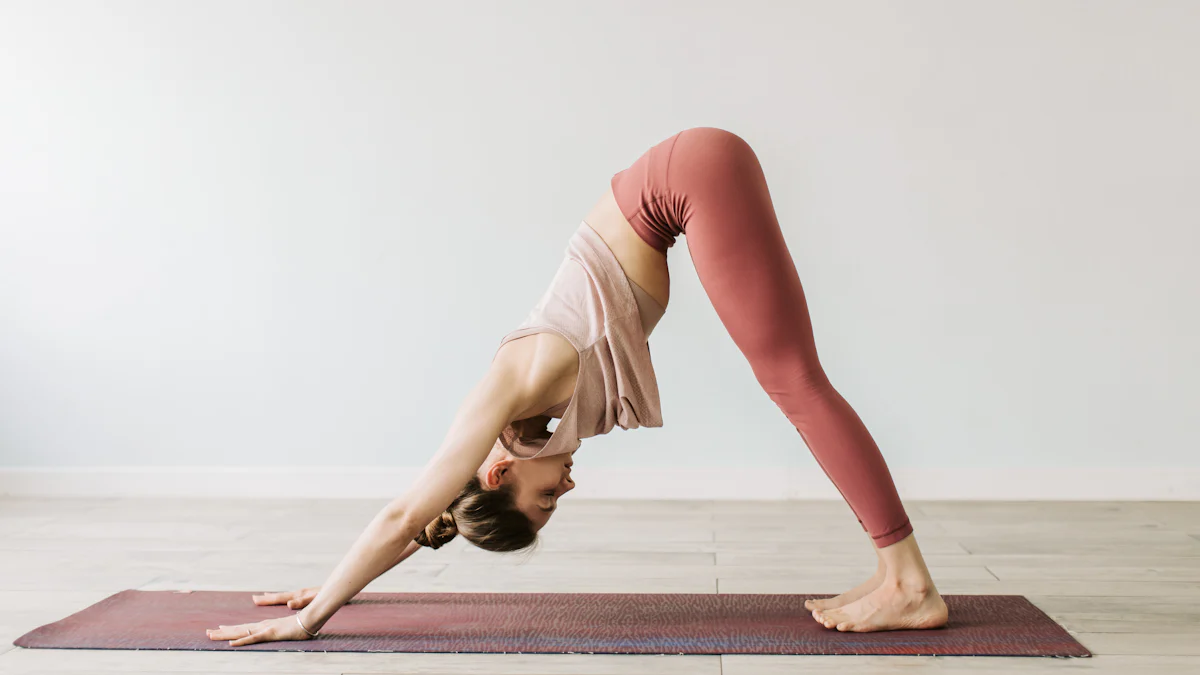
Artistic yoga photography captures the beauty and grace of movement. You can showcase the strength and flexibility of yoga poses while evoking emotion through your lens. This form of photography allows you to tell a story, highlighting the connection between body and mind. With over 36 million Americans practicing yoga, the demand for stunning visuals continues to grow. Embrace this opportunity to create artistic yoga pictures that inspire and resonate with others.
Key Takeaways
Choose the right location—natural settings or studios—to enhance the beauty of your yoga pictures.
Select dynamic poses, both flowing and static, to showcase the strength and grace of yoga.
Master lighting techniques by utilizing natural light during golden hours or experimenting with artificial lighting in studios.
Focus on composition using techniques like the rule of thirds and leading lines to create engaging images.
Experiment with different angles, such as low and high perspectives, to add drama and context to your photos.
Incorporate props creatively to enhance poses and add visual interest to your compositions.
Capture genuine emotions by allowing for candid moments and guiding your subject to express specific feelings.
Choose the Right Location for Artistic Yoga Pictures
Finding the perfect location can elevate your artistic yoga pictures. The right backdrop enhances the beauty of the poses and adds depth to your images. You have two main options: natural settings and studio environments.
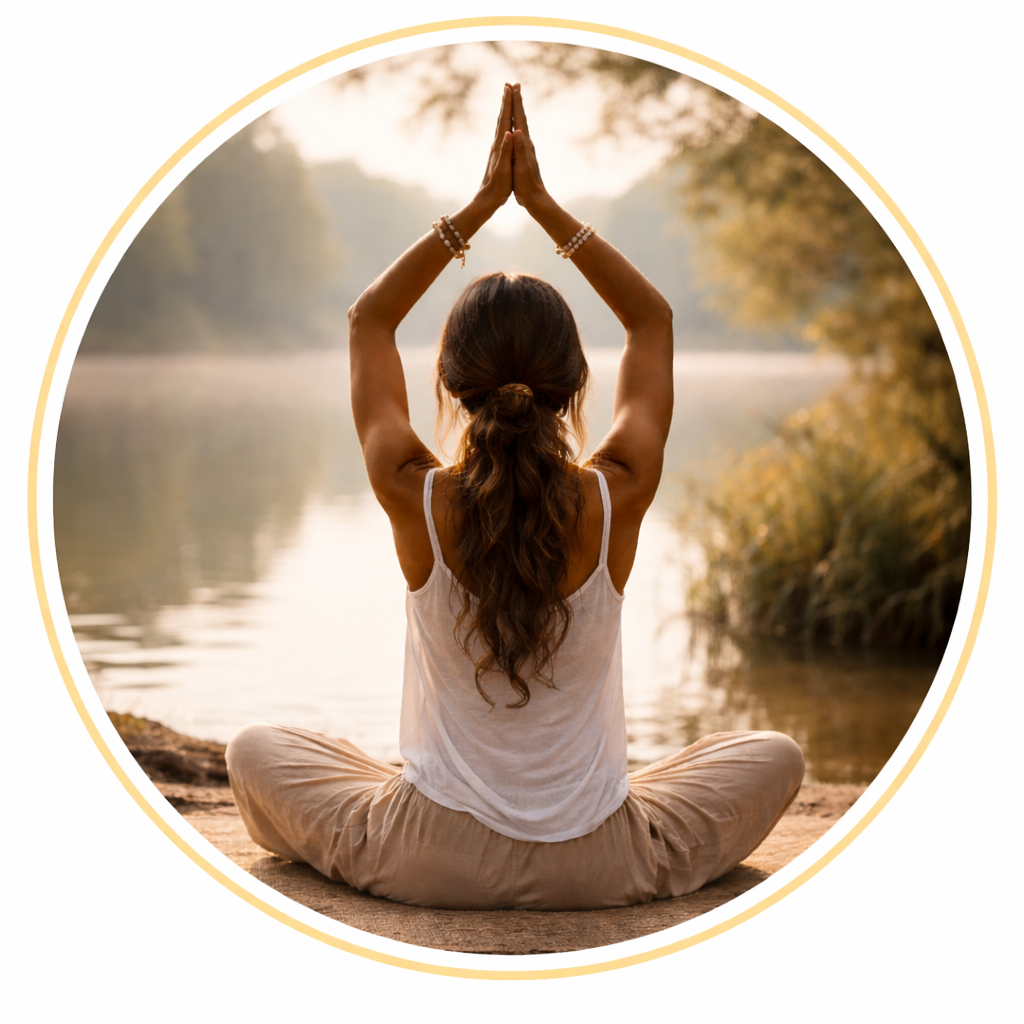
Natural Settings
Natural settings offer stunning visuals that can transform your yoga photography. Think about parks, beaches, or mountains. These locations provide vibrant colors and textures that complement the fluidity of yoga.
When you shoot outdoors, consider the time of day. Early morning or late afternoon light creates a soft glow, perfect for capturing the essence of yoga. Use a DSLR camera or a mirrorless camera to capture the details of both the poses and the surrounding environment. A wide aperture lens helps fit more scenery into the frame, showcasing the connection between the practitioner and nature.
Here are some tips for shooting in natural settings:
Look for interesting backgrounds like trees, water, or rocks.
Use the landscape to frame your subject.
Experiment with different angles to highlight the pose against the backdrop.
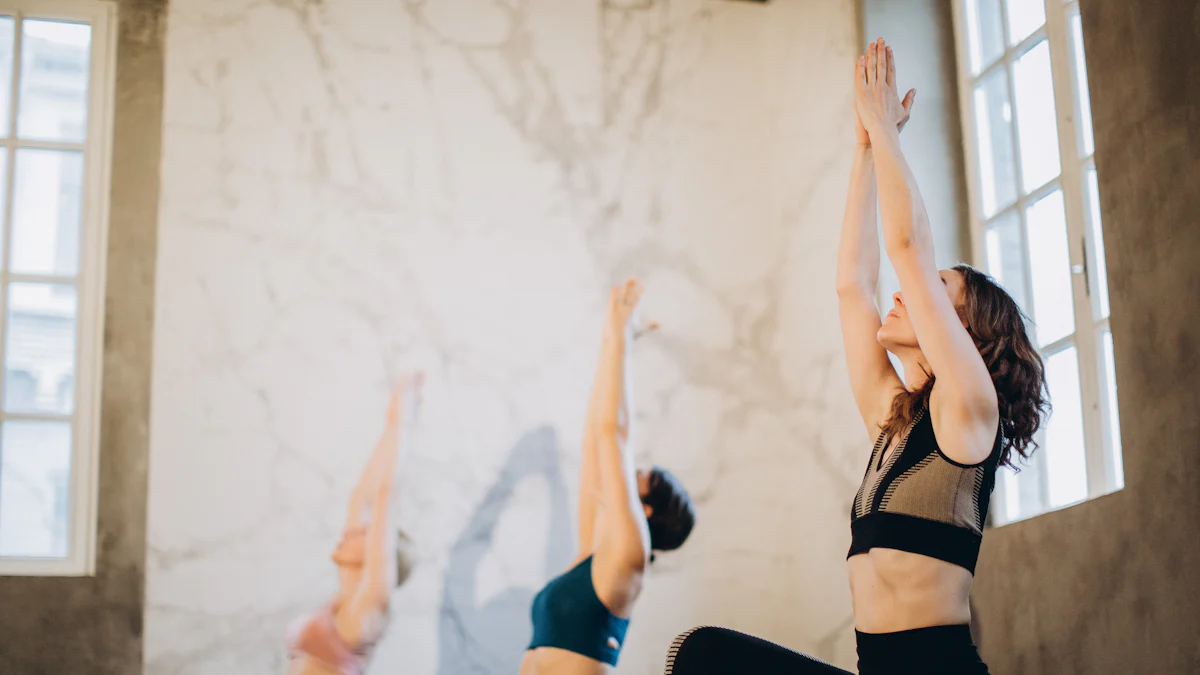
Studio Environments
Studio environments provide a controlled setting for your artistic yoga pictures. You can manipulate lighting and backgrounds to achieve the desired effect. A clean, uncluttered space allows the focus to remain on the yoga poses.
In a studio, you can use artificial lighting to create dramatic effects. Softboxes or ring lights can enhance the subject's features and add depth to the images. A tripod is essential here, ensuring sharp images even in low light conditions.
Consider these tips for studio photography:
Choose a simple backdrop to avoid distractions.
Use props creatively to enhance the poses.
Capture various angles to showcase the strength and flexibility of the practitioner.
By selecting the right location, whether in nature or a studio, you set the stage for stunning artistic yoga pictures that resonate with viewers.
Select Dynamic Poses for Artistic Yoga Pictures
Choosing the right poses can make or break your artistic yoga pictures. Dynamic poses bring energy and movement to your shots. They showcase the beauty of yoga while capturing the essence of the practice. You can focus on two main types of poses: flowing movements and static poses.
Flowing Movements
Flowing movements create a sense of grace and fluidity in your photos. These poses often involve transitions between different positions, which can highlight the practitioner's strength and flexibility. When you capture these movements, aim for a sense of continuity.
To achieve this, consider using a faster shutter speed. This technique freezes the action, allowing you to capture each moment clearly. You might also experiment with longer exposures to create a sense of motion. This approach can add a dreamy quality to your artistic yoga pictures.
Here are some tips for capturing flowing movements:
Encourage your subject to move smoothly from one pose to another.
Use a continuous shooting mode on your camera to capture multiple frames in quick succession.
Focus on the lines and shapes created by the body during the transition.
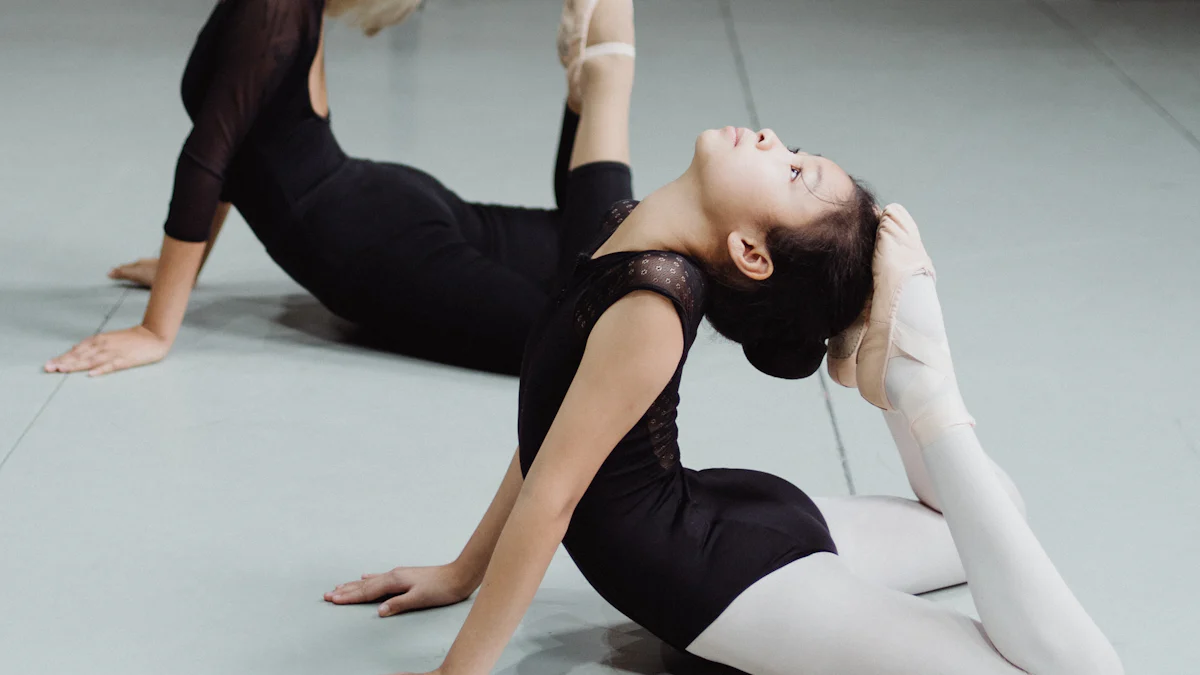
Static Poses
Static poses offer a different kind of beauty. They allow you to emphasize balance, strength, and concentration. These poses often require the practitioner to hold a position, which can convey a sense of peace and stability.
When photographing static poses, pay attention to the details. Capture the alignment of the body and the expression on the subject's face. Use a tripod to ensure sharp images, especially if you're working in lower light conditions.
Consider these tips for static poses:
Frame your subject carefully to highlight their form.
Use props to enhance the pose and add interest to the composition.
Experiment with different angles to showcase the pose's strength and elegance.
By selecting dynamic poses, whether flowing or static, you can create stunning artistic yoga pictures that resonate with viewers.
Master Lighting Techniques for Artistic Yoga Pictures
Lighting plays a crucial role in capturing stunning artistic yoga pictures. You can use both natural and artificial light to create different moods and effects. Each type of lighting has its unique advantages, so let’s explore how to master them.
Natural Light
Natural light can transform your yoga photography. It creates a soft, ethereal quality that enhances the beauty of the poses. Many photographers prefer working with natural light because it brings out the colors and textures of the surroundings.
When shooting outdoors, aim for early morning or late afternoon. The golden hour provides warm, flattering light that adds a magical touch to your images. Position your subject so the light falls on them from the side or behind. This technique creates depth and highlights the contours of the body.
Here are some tips for using natural light effectively:
Scout your location ahead of time to find the best spots for lighting.
Avoid harsh midday sun, which can create unflattering shadows.
Experiment with backlighting to create silhouettes or a halo effect around your subject.
Remember, the right light can elevate your artistic yoga pictures to new heights.
Artificial Light
Artificial light opens up a world of creative possibilities. It allows you to control the environment and create dramatic effects. You can use softboxes, ring lights, or even simple lamps to enhance your photos.
In a studio setting, you can manipulate the light to achieve the desired mood. Soft, diffused light works well for a gentle, calming effect. On the other hand, harsher light can create striking contrasts and emphasize the strength of the poses.
Consider these tips when working with artificial light:
Use a tripod to keep your camera steady, especially in low-light situations.
Experiment with different light sources to see how they affect your images.
Combine natural and artificial light for a balanced look that captures the essence of yoga.
By mastering both natural and artificial lighting techniques, you can create captivating artistic yoga pictures that resonate with viewers.
Focus on Composition for Artistic Yoga Pictures
Composition plays a vital role in creating stunning artistic yoga pictures. It helps you guide the viewer's eye and enhances the overall impact of your images. Two essential techniques to master are the rule of thirds and leading lines.
Rule of Thirds
The rule of thirds is a classic composition technique that can elevate your yoga photography. Imagine dividing your frame into nine equal parts with two horizontal and two vertical lines. Placing your subject along these lines or at their intersections creates a more balanced and engaging image.
When you apply this technique, you draw attention to the subject while allowing the background to complement the pose. For instance, if you photograph a practitioner in a warrior pose, position them slightly off-center. This approach adds interest and makes the image feel more dynamic.
Here are some tips for using the rule of thirds effectively:
Visualize the grid: Before taking the shot, mentally divide your frame.
Experiment with placement: Try different positions for your subject to see what works best.
Combine with other techniques: Use the rule of thirds alongside leading lines for even more compelling compositions.
Leading Lines
Leading lines guide the viewer's eye toward the main subject. They can be natural elements like paths, rivers, or trees, or they can be man-made structures. Incorporating leading lines into your artistic yoga pictures creates depth and draws attention to the pose.
When you find a strong leading line, position your subject at the end of it. This technique not only highlights the practitioner but also adds context to the image. For example, if you're shooting on a beach, use the shoreline as a leading line that directs the viewer's gaze toward the yogi.
Consider these tips for utilizing leading lines:
Look for patterns: Search for lines in your environment that can enhance your composition.
Experiment with angles: Change your perspective to find the most effective leading lines.
Combine with the rule of thirds: Use both techniques together for a powerful visual impact.
By focusing on composition techniques like the rule of thirds and leading lines, you can create artistic yoga pictures that captivate and inspire your audience.
Experiment with Angles for Artistic Yoga Pictures
Finding the right angle can transform your artistic yoga pictures. Different perspectives reveal unique aspects of the poses. You can create a more dynamic and engaging image by experimenting with low and high angles.
Low Angles
Shooting from a low angle can add drama and power to your yoga photography. This perspective emphasizes the height and strength of the practitioner. It also allows you to capture the pose against a more expansive background, making the subject appear larger than life.
When you shoot from below, consider the following tips:
Position yourself on the ground: Get low to the ground to create a striking viewpoint.
Include the sky: Use the sky as a backdrop to enhance the mood of your image.
Focus on the lines: Capture the lines created by the body, which can look more pronounced from this angle.
This technique can highlight the grace and flexibility of the poses. You might find that low angles create a sense of empowerment in your photos.
High Angles
High angles offer a different perspective that can be equally captivating. Shooting from above allows you to capture the entire scene, including the surroundings. This angle can provide context and tell a more complete story about the practice of yoga.
When you take photos from a high angle, keep these tips in mind:
Use a ladder or elevated surface: Find a safe way to get above your subject for the best results.
Capture the flow: This angle works well for flowing movements, showcasing transitions between poses.
Experiment with framing: Include elements of the environment to create a more interesting composition.
High angles can also emphasize the symmetry and balance of the poses. You might discover that this perspective adds a fresh dimension to your artistic yoga pictures.
By experimenting with both low and high angles, you can enhance your yoga photography. Each perspective offers unique storytelling opportunities. Don't hesitate to try different angles to find what resonates with you and your audience.
Use Props Creatively in Artistic Yoga Pictures
Enhancing the Pose
Props can elevate your artistic yoga pictures. They add depth and dimension to your shots. Think about using blocks, straps, or blankets. These items not only support the practitioner but also enhance the pose's visual appeal.
When you incorporate props, focus on how they interact with the body. For example, a block can help a yogi achieve better alignment in a pose. Capture this connection through your lens. You might find that using props encourages the practitioner to explore new variations of familiar poses. This exploration can lead to unique and captivating images.
Here are some tips for enhancing poses with props:
Use a block to lift the ground closer to the practitioner. This adjustment can create a more dynamic line in the photo.
Incorporate straps to showcase flexibility. Capture the tension and strength in the pose.
Experiment with different props to see how they change the overall composition.
Adding Interest
Props can also add interest to your artistic yoga pictures. They create visual elements that draw the viewer's eye. A colorful blanket or a textured mat can serve as a striking backdrop. This contrast can make the subject pop in the frame.
Consider how props can tell a story. For instance, a yoga wheel can symbolize balance and strength. Capture the practitioner using it in a pose that highlights these qualities. This approach adds layers of meaning to your images.
Here are some ideas for adding interest with props:
Choose props that complement the color palette of your shoot. This harmony can create a cohesive look.
Use props in unexpected ways. For example, drape a scarf over a shoulder to add movement and flair.
Capture candid moments where the practitioner interacts with the props. These shots often convey genuine emotion and connection.
By using props creatively, you can transform your artistic yoga pictures. They enhance poses and add layers of interest that engage viewers.
Capture Emotion and Expression in Artistic Yoga Pictures
Capturing emotion in your artistic yoga pictures adds depth and meaning. It transforms a simple pose into a powerful story. You can evoke feelings of serenity, strength, and connection through your lens. Let’s explore how to capture both candid moments and intentional expressions.
Candid Moments
Candid moments often reveal the true essence of yoga. When practitioners lose themselves in their practice, they express genuine emotions. These moments can showcase joy, concentration, or even tranquility.
To capture these authentic feelings, create a relaxed atmosphere. Encourage your subject to flow through their poses without worrying about the camera. This approach allows you to snap those spontaneous smiles or serene gazes.
Here are some tips for capturing candid moments:
Be patient: Wait for the right moment. Sometimes, the best shots happen when you least expect them.
Use a longer lens: This allows you to maintain distance while still capturing intimate moments.
Stay alert: Keep your camera ready. You never know when a beautiful expression will appear.
Candid shots can make your artistic yoga pictures relatable. They invite viewers to connect with the practice on a personal level.
Intentional Expressions
Intentional expressions can also enhance your artistic yoga pictures. These expressions convey specific emotions that align with the pose. For example, a warrior pose can express strength and determination. A gentle forward bend might evoke peace and introspection.
To achieve this, communicate with your subject. Discuss the feelings you want to capture before the shoot. Encourage them to embody those emotions during their practice.
Consider these tips for capturing intentional expressions:
Direct your subject: Guide them on how to express the desired emotion. Use phrases like "show strength" or "embody calmness."
Capture the eyes: The eyes often reveal the most emotion. Focus on them to convey the feeling behind the pose.
Experiment with angles: Different perspectives can highlight expressions in unique ways.
By focusing on both candid moments and intentional expressions, you can create artistic yoga pictures that resonate deeply with viewers. These images not only showcase the beauty of yoga but also tell a story that inspires and connects.
Pay Attention to Backgrounds in Artistic Yoga Pictures
Choosing the right background can make a huge difference in your artistic yoga pictures. A well-selected background enhances the overall composition and draws attention to the subject. You can opt for simplistic backgrounds or textured ones, depending on the mood you want to convey.
Simplistic Backgrounds
Simplistic backgrounds keep the focus on the yoga practitioner. They create a clean and uncluttered look that highlights the beauty of the poses. Think about using solid colors or soft gradients. These backgrounds allow the viewer to appreciate the form and movement without distractions.
When you choose a simplistic background, consider these tips:
Use neutral colors: Whites, grays, or soft pastels work well. They create a calming effect and let the subject shine.
Avoid busy patterns: Patterns can compete for attention. Keep it simple to maintain focus on the pose.
Experiment with depth: A blurred background can add depth while keeping the subject in sharp focus.
A simplistic background can evoke a sense of peace and tranquility, making your artistic yoga pictures resonate with viewers.
Textured Backgrounds
Textured backgrounds add interest and dimension to your photos. They can create a rich visual experience that complements the yoga practice. Think about using natural elements like rocks, trees, or even urban settings with interesting architecture. These textures can enhance the story behind the pose.
Here are some ideas for using textured backgrounds effectively:
Look for natural textures: Bark, grass, or stone can add a beautiful contrast to the smooth lines of the body.
Incorporate urban elements: Walls with graffiti or interesting architectural features can create a vibrant backdrop.
Balance the composition: Ensure the texture doesn’t overpower the subject. The focus should still be on the yoga pose.
Textured backgrounds can evoke emotions and tell a story, making your artistic yoga pictures more engaging.
By paying attention to backgrounds, you can elevate your yoga photography. Whether you choose a simplistic or textured backdrop, each option offers unique opportunities to enhance your artistic vision.
Edit Thoughtfully for Artistic Yoga Pictures
Editing your artistic yoga pictures can elevate them to new heights. You want to enhance the beauty of each shot while maintaining the essence of the practice. Let’s dive into two key aspects of editing: basic adjustments and creative filters.
Basic Adjustments
Start with basic adjustments to improve your images. These tweaks can make a significant difference. Focus on the following elements:
Exposure: Adjust the brightness to ensure your subject stands out. You want to highlight the details in the poses without losing the background.
Contrast: Increase contrast to add depth. This adjustment helps the colors pop and gives your photos a more dynamic feel.
Saturation: Enhance the colors slightly. You want the hues to be vibrant but not overwhelming. A little goes a long way.
Sharpness: Increase sharpness to define the edges of your subject. This adjustment brings clarity to the poses and emphasizes the strength and flexibility of the practitioner.
Using software like Adobe Photoshop can help you make these adjustments easily. The layer opacity tool allows you to fine-tune your edits without losing the original image quality.
Creative Filters
Once you finish basic adjustments, consider applying creative filters. Filters can add a unique touch to your artistic yoga pictures. They can evoke different moods and enhance the overall aesthetic. Here are some ideas:
Black and White: This classic filter can create a timeless feel. It emphasizes shapes and forms, allowing the viewer to focus on the pose itself.
Vintage: A vintage filter can add warmth and nostalgia. This effect works well for outdoor shots, giving them a dreamy quality.
Color Grading: Experiment with color grading to create a specific mood. You can use cooler tones for a calming effect or warmer tones for energy and vibrancy.
Remember, filters should enhance your images, not overpower them. Use them thoughtfully to maintain the integrity of your artistic yoga pictures.
By editing thoughtfully, you can transform your yoga photography. Basic adjustments set the foundation, while creative filters add flair. Embrace the editing process as part of your artistic journey.
Practice Patience for Artistic Yoga Pictures
Timing the Shot
Capturing the perfect moment in yoga photography requires patience. You need to wait for the right pose, the right expression, and the right light. Sometimes, the best shots happen when you least expect them. You might find that a practitioner holds a pose longer than planned, revealing a beautiful moment of stillness.
To improve your timing, consider these tips:
Observe the flow: Watch how the practitioner moves. Anticipate when they will reach a peak moment in their pose.
Use continuous shooting mode: This feature allows you to take multiple shots in quick succession. You can capture a range of expressions and movements.
Be ready: Keep your camera settings adjusted for the environment. This way, you won’t miss that fleeting moment.
Patience pays off. You’ll find that waiting for the right shot often leads to stunning artistic yoga pictures.
Allowing for Flow
Yoga is all about flow. The practice involves transitions between poses, and capturing this fluidity adds depth to your photography. Allow the practitioner to move naturally. This approach creates a relaxed atmosphere, which often results in more authentic expressions and poses.
Here are some ways to embrace the flow:
Encourage movement: Let the yogi transition between poses without interruption. This freedom can lead to unexpected and beautiful moments.
Capture the journey: Focus on the process rather than just the final pose. Documenting the flow can tell a more complete story about the practice.
Stay present: Immerse yourself in the moment. Pay attention to the energy and rhythm of the practice. This awareness helps you anticipate great shots.
Remember, yoga photography is an art form that demands creativity and a unique perspective. By practicing patience and allowing for flow, you can capture the essence of yoga in your artistic yoga pictures.
Each tip in this blog enhances your ability to capture stunning artistic yoga pictures. From choosing the right location to mastering lighting techniques, every detail matters. Don't hesitate to practice and experiment with your photography skills. The more you shoot, the better you'll become. Remember, artistic photography is a journey of exploration. Embrace the process, learn from each experience, and let your creativity flow.
FAQ
What camera should I use for yoga photography?
You can use any camera that allows you to adjust settings. A DSLR or mirrorless camera works best. These cameras give you control over aperture, shutter speed, and ISO. If you have a smartphone, you can still capture great shots. Just focus on lighting and composition.
How do I find the best lighting for my photos?
Natural light is your best friend. Shoot during the golden hour, which is early morning or late afternoon. This light creates a soft, warm glow. If you’re indoors, use softboxes or ring lights to mimic natural light. Avoid harsh midday sun, as it can create unflattering shadows.
What types of poses work best for artistic yoga pictures?
Dynamic poses add energy to your photos. Flowing movements show grace and fluidity. Static poses emphasize strength and balance. Mix both types to create a diverse portfolio. Encourage your subject to explore different poses to find what resonates.
How can I improve my composition in yoga photography?
Use the rule of thirds to create balanced images. Imagine dividing your frame into nine equal parts. Place your subject along these lines or at their intersections. Leading lines can also guide the viewer’s eye toward your subject. Look for natural elements in your environment to enhance your composition.
Should I use props in my yoga photography?
Absolutely! Props can enhance poses and add interest. Use blocks, straps, or blankets to support the practitioner. They can also create unique shapes and lines in your images. Experiment with different props to see how they change the overall look of your photos.
How do I capture emotions in my yoga pictures?
Candid moments often reveal genuine emotions. Allow your subject to flow through their practice without worrying about the camera. This approach leads to authentic expressions. You can also direct your subject to embody specific feelings during poses for intentional expressions.
What backgrounds work best for yoga photography?
Choose backgrounds that complement your subject. Simplistic backgrounds keep the focus on the practitioner. Use neutral colors or soft gradients for a calming effect. Textured backgrounds add depth and interest. Look for natural elements or urban settings to enhance your images.
How important is editing in yoga photography?
Editing plays a crucial role in enhancing your photos. Start with basic adjustments like exposure, contrast, and sharpness. These tweaks can significantly improve your images. After that, consider applying creative filters to evoke different moods. Just remember to keep the edits subtle.
How can I practice patience during a photoshoot?
Patience is key in yoga photography. Wait for the right moment to capture the perfect pose or expression. Observe the flow of the practice and anticipate peak moments. Allow your subject to move naturally, which often leads to more authentic shots.
Can I shoot yoga photography alone?
Yes, you can! However, having a model helps you capture poses more effectively. If you’re shooting alone, consider using a tripod and a timer. This setup allows you to take self-portraits. Experiment with different angles and poses to find what works best for you.
See Also
Simple Steps to Begin Your Yoga Journey
Top 15 Websites Offering Free Yoga Images
Beginner's Guide to Iyengar Yoga Literature
Hi my name is Lia and i am your host in this yoga journey in Portugal, Subscribe to our newsletter to receive every week the best of Yoga in Portugal.

We bring back the importance of initiation into womanhood by Roos-Veerle Krijnen & Ella-June Henrard
Welcome to the Women’s Initiation Retreat by Naked Truth Retreats, a transformative journey into the depths of your True Feminine Nature. This retreat invites you to remember the sacredness and wholeness of your being.
Roos-Veerle Krijnen & Ella-June Henrard